 @tresjs/nuxt
@tresjs/nuxt
在您的 Nuxt 应用程序中使用 TresJS 创建 3D 体验。

@tresjs/nuxt


TresJS 的官方 Nuxt 模块。像 Vue 组件一样构建 3D 场景。
特性
- 🤓 自动导入来自 TresJS 生态系统的组件和组合式函数
TresCanvas仅客户端,您无需将.client添加到组件名称或<ClientOnly />- 自动配置 vue 编译器以支持 TresJS 组件,请参阅为什么?
- Nuxt ✨ 带来的所有 DX 魔力
- 新版 v2:TresJS nuxt devtools。
快速设置
- 将
@tresjs/nuxt依赖项添加到您的项目
npx nuxi@latest module add tresjs
- 将
@tresjs/nuxt添加到nuxt.config.ts的modules部分
export default defineNuxtConfig({
  modules: ['@tresjs/nuxt'],
})
就是这样!您现在可以在您的 Nuxt 应用程序中使用 @tresjs/nuxt ✨
如果您想使用 TresJS 生态系统中的任何软件包,您可以安装您想使用的软件包,它们将由模块自动导入 🧙🏼♂️。
# Using pnpm
pnpm add @tresjs/cientos @tresjs/post-processing
Devtools
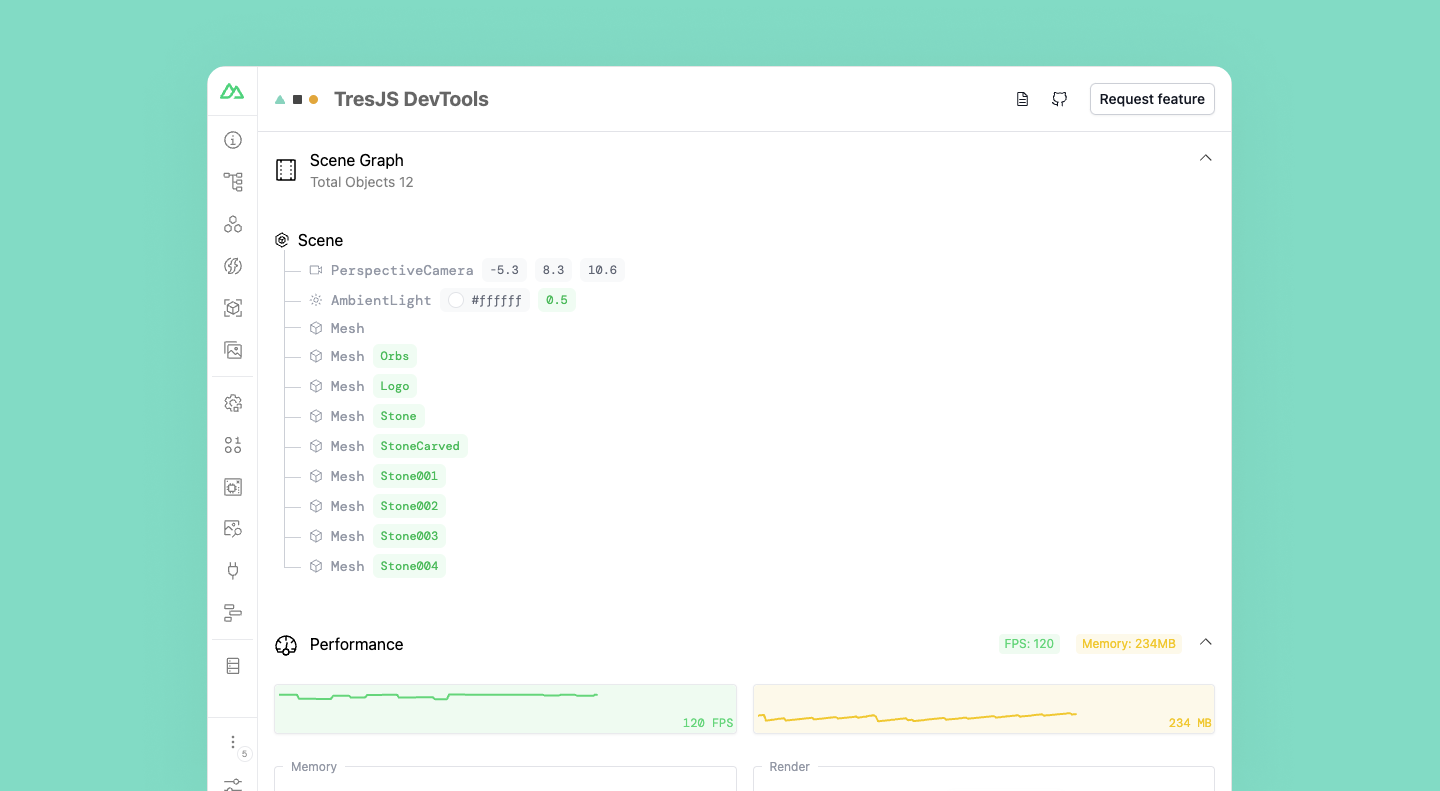
TresJS nuxt 模块带有一个 devtools 扩展,允许您检查 3D 场景并测量性能。
要激活 devtools,您需要将 devtools 选项添加到 nuxt.config.ts 的 tres 部分。
export default defineNuxtConfig({
  modules: ['@tresjs/nuxt', '@nuxt/devtools'],
  tres: {
    devtools: true,
  },
})
GLSL shaders 支持
TresJS nuxt 模块带有一个 vite 插件,允许您将 GLSL shaders 作为字符串导入。它在底层使用 vite-plugin-glsl。
export default defineNuxtConfig({
  modules: ['@tresjs/nuxt', '@nuxt/devtools'],
  tres: {
    glsl: true,
  },
})
启用此选项后,您可以在组件中将 GLSL shaders 作为字符串导入。
<script setup lang="ts">
import fragmentShader from './shaders/fragment.glsl'
import vertexShader from './shaders/vertex.glsl'

const uniforms = {
  uTime: { value: 0 },
  uAmplitude: { value: new Vector2(0.1, 0.1) },
  uFrequency: { value: new Vector2(20, 5) },
}
</script>

<template>
  <TresMesh
    :position="[0, 4, 0]"
  >
    <TresSphereGeometry :args="[2, 32, 32]" />
    <TresShaderMaterial
      :vertex-shader="vertexShader"
      :fragment-shader="fragmentShader"
      :uniforms="uniforms"
    />
  </TresMesh>
</template>
开发
# Install dependencies
npm install

# Generate type stubs
npm run dev:prepare

# Develop with the playground
npm run dev

# Build the playground
npm run dev:build

# Run ESLint
npm run lint

# Run Vitest
npm run test
npm run test:watch

# Release new version
npm run release